
The Best Fluffy Pancakes recipe you will fall in love with. Full of tips and tricks to help you make the best pancakes.
How to Blow Dry Hair Like a Professional for Salon-Quality Results at Home
Have you ever spent 30 minutes blow drying your hair only to end up with frizz, flat roots, flyaways, or a style that falls apart within an hour?
You’re not alone. Many people assume professional-looking blowouts require years of salon experience, but the truth is that technique matters far more than natural talent. Learning how to blow dry hair like a professional comes down to using the right tools, preparing your hair properly, and following a step-by-step process that protects your hair while creating smooth, long-lasting results.
In this guide, you’ll learn exactly how to achieve a salon-worthy blowout at home, fix common blow drying mistakes, add volume where you need it, reduce frizz, and make your style last longer. Whether you have straight, wavy, curly, fine, or thick hair, these techniques can help you get noticeably better results.
Why Most At-Home Blowouts Don’t Look Professional
Before jumping into the tutorial, it helps to understand what usually goes wrong.
Common blow drying problems include:
- Excessive frizz
- Flat roots and lack of volume
- Hair that takes forever to dry
- Flyaways and static
- Overheated, damaged strands
- Ends that flip in random directions
- Blowouts that lose shape quickly
Most of these issues happen because of poor preparation, incorrect airflow direction, or using the wrong brush for your hair type.
Recommended Product:
BaBylissPRO Nano Titanium Hair Dryer
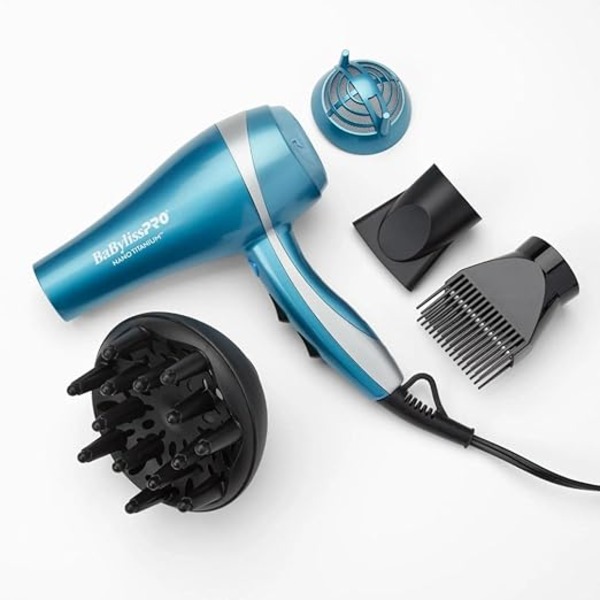
Perfect For:
- Creating smooth tension during blow drying
- Adding volume at the roots
- Shaping bangs and face-framing layers
Why it works: It includes a slim concentrator nozzle that directs powerful, high-velocity airflow exactly where you need it. This concentrated stream gives you total control to build smooth tension against a brush, direct heat directly under the roots for lift, and isolate face-framing layers or bangs without disrupting surrounding hair.Recommended Product:
What You’ll Need for a Professional Blowout
Having the right tools makes the process significantly easier.
Essential Tools
- Quality hair dryer with multiple heat settings
- Concentrator nozzle attachment
- Heat protectant spray or cream
- Sectioning clips
- Round brush
- Wide-tooth comb
- Finishing serum or lightweight oil
Optional Tools
- Volumizing mousse
- Root-lifting spray
- Cool-shot dryer feature
- Boar bristle round brush
- Smoothing cream
Step 1: Start with Clean, Properly Prepared Hair
Professional blowouts begin long before the dryer turns on.
Wash your hair using products suited to your hair type. Heavy products can weigh hair down, while overly clarifying formulas may leave it dry and difficult to style.
After washing:
- Gently squeeze excess water from your hair.
- Pat dry with a microfiber towel.
- Avoid aggressively rubbing your hair.
- Apply a heat protectant from mid-lengths to ends.
Pro Tip
Hair should be damp—not soaking wet—before blow drying. If your hair is dripping, you’ll spend too much time exposing it to heat.
Step 2: Detangle Thoroughly
Knots and tangles create uneven drying and can lead to breakage.
Work through your hair carefully using a wide-tooth comb, starting at the ends and gradually moving upward.
This simple step helps:
- Improve airflow
- Reduce snagging
- Speed up drying time
- Create a smoother finish
Step 3: Apply Styling Products Strategically
One reason salon blowouts last longer is proper product placement.
For Fine Hair
Use:
- Volumizing mousse
- Lightweight root lifter
Avoid:
- Heavy oils
- Thick creams
For Thick or Coarse Hair
Use:
- Smoothing cream
- Leave-in conditioner
- Anti-frizz serum
For Curly Hair
Use:
- Curl-friendly heat protectant
- Moisturizing styling cream
Avoid applying excessive product near the scalp unless it is specifically designed for root volume.
Step 4: Rough Dry to About 70–80%
Many beginners make the mistake of using a round brush immediately.
Professionals typically rough dry first.
How to Rough Dry
- Set the dryer to medium heat.
- Use your fingers to lift and move sections.
- Focus on removing most of the moisture.
- Continue until hair is about 70–80% dry.
This dramatically reduces styling time and minimizes heat exposure.
Step 5: Divide Hair into Sections
Sectioning is one of the biggest differences between professional and amateur blow drying.
Separate your hair into:
- Top section
- Crown section
- Left side
- Right side
- Back section
Secure each area using clips.
Working in smaller sections gives you:
- Better control
- Smoother results
- Faster styling
- More consistent volume
Read also : Best Curling Irons for Fine Hair: The Technical Low-Heat Guide
Step 6: Use the Concentrator Nozzle Correctly
The nozzle is not optional if your goal is a salon-quality finish.
It directs airflow exactly where you need it and helps smooth the hair cuticle.
Always point airflow downward from roots to ends.
Why?
The hair cuticle naturally lies downward. Following this direction creates:
- More shine
- Less frizz
- Smoother strands
- Better polish
Recommended Product:
FHI Heat UNBRUSH Detangling Hair Brush
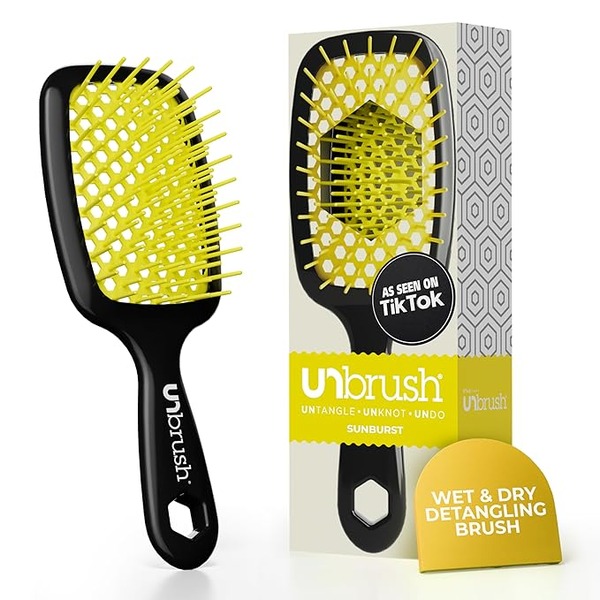
Perfect For:
- Applying heat protectant evenly before blow drying
- Detangling wet hair without excessive breakage
- Creating a smoother foundation for styling
Why this is the best single choice: Its cushionless, vented matrix matrix prevents hair products from clogging up the brush base, allowing heat protectants to coat individual strands evenly before you blow dry. At the same time, the ultra-flexible bristles handle wet tangles without pulling or causing breakage.
Step 7: Master the Round Brush Technique
This is where the professional finish starts to appear.
For Volume
- Place the brush underneath the section at the root.
- Lift upward and slightly away from the head.
- Follow closely with the dryer.
- Roll the brush as you move downward.
For Smoothness
- Keep steady tension.
- Pull the brush straight.
- Maintain downward airflow.
- Move slowly through each section.
For Curved Ends
Wrap the ends around the brush and rotate inward slightly while applying heat.
Step 8: Focus on the Roots First
Many people spend too much time styling the ends.
Professional stylists know that roots create the foundation of the entire style.
Proper root drying helps:
- Increase volume
- Prevent collapse
- Extend style longevity
- Improve overall shape
If roots remain damp, the blowout often fails regardless of how polished the ends look.
Step 9: Lock Each Section with Cool Air
One of the most overlooked salon secrets is the cool shot button.
Heat shapes the hair.
Cool air locks the shape in place.
After finishing a section:
- Keep the brush in position.
- Apply cool air for several seconds.
- Release the brush.
This helps the style hold significantly longer.
Step 10: Finish with Lightweight Styling Products
Once all sections are complete, use finishing products sparingly.
Good options include:
- Lightweight serum
- Anti-frizz spray
- Shine spray
- Flexible-hold hairspray
Less is usually more.
Applying too much product can flatten volume and make hair appear greasy.
How to Fix Common Blow Drying Problems
Problem: Frizzy Hair
Possible causes:
- Nozzle not used
- Airflow directed randomly
- Hair too wet during styling
- Insufficient tension
Solution:
- Use a concentrator nozzle
- Dry in smaller sections
- Direct airflow downward
Problem: Flat Roots
Possible causes:
- Roots not lifted during drying
- Heavy products near scalp
- Hair pulled straight down
Solution:
- Lift roots upward
- Use volumizing products
- Focus on crown area
Problem: Hair Takes Too Long to Dry
Possible causes:
- Hair too wet
- Large sections
- Low-powered dryer
Solution:
- Rough dry first
- Use smaller sections
- Remove excess moisture before styling
Problem: Flyaways
Possible causes:
- Excessive heat
- Dry hair
- Static buildup
Solution:
- Lower heat settings
- Use a lightweight serum
- Finish with cool air
Common Blow Drying Mistakes to Avoid
Holding the Dryer Too Close
This increases the risk of heat damage and uneven drying.
Skipping Heat Protectant
Heat protectant helps reduce moisture loss and minimizes damage from styling tools.
Using Maximum Heat Constantly
High heat is not always better.
Medium heat often produces smoother, healthier-looking results.
Rushing Through Sections
Professional blowouts rely on patience and controlled tension.
Ignoring Hair Type
Techniques should be adjusted based on texture, density, and length.
Hair Care and Safety Tips
To keep your hair healthy while blow drying regularly:
- Always use heat protectant
- Avoid daily high-heat styling when possible
- Deep condition weekly
- Trim split ends regularly
- Clean your dryer filter monthly
- Replace worn brushes when needed
If you notice excessive dryness, breakage, or split ends, reduce heat exposure and focus on strengthening treatments.
Recommended Product:
Olaplex No. 7 Bonding Oil
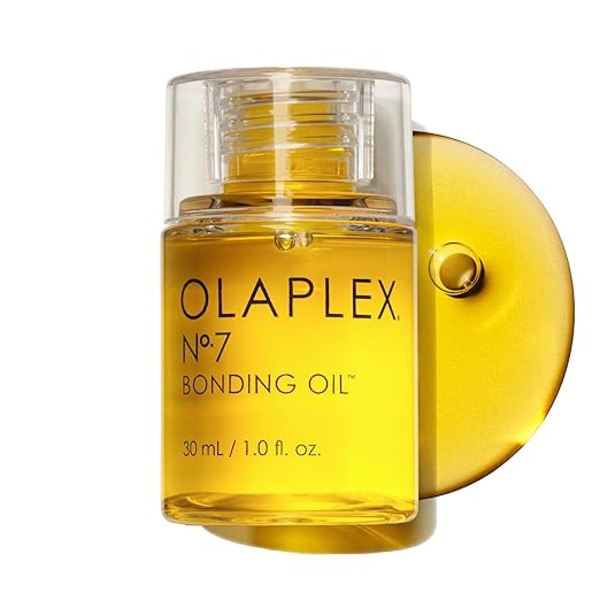
Perfect For:
- Adding shine after a finished blowout
- Controlling frizz and flyaways
- Maintaining a polished salon-quality finish
Why it works: This ultra-lightweight, highly concentrated styling oil delivers high-shine clarity without weighing down your hair or leaving a greasy residue. Just a few drops smooth down stubborn flyaways, seal split ends, and tame humidity-induced frizz to keep a freshly blown-out style looking sleek and salon-polished all day.
Conclusion
Learning how to blow dry hair like a professional isn’t about using complicated techniques—it’s about following a structured process. Proper preparation, sectioning, controlled airflow, and strategic use of a round brush can dramatically improve your results.
Remember to start with damp, protected hair, rough dry before styling, work in manageable sections, direct airflow downward, and use cool air to lock in the finished shape. With practice, you’ll be able to create smoother, shinier, longer-lasting blowouts while avoiding the common problems that frustrate many at-home stylers.
The more consistently you apply these techniques, the closer your results will come to a salon-quality blowout—without the salon appointment.
FAQ
How do professionals blow dry hair without causing damage?
Professionals use heat protectants, keep the dryer moving, avoid excessive heat, and maintain proper distance between the dryer and the hair.
Is it better to blow dry hair wet or damp?
Hair should be damp, not soaking wet. Rough drying to about 70–80% before styling is often recommended for faster, smoother results.
What type of brush is best for blow drying hair?
A round brush is typically best for creating volume, smoothness, and shape. The ideal size depends on your hair length and desired style.
Why does my hair get frizzy after blow drying?
Frizz is often caused by improper airflow direction, lack of tension, excessive moisture, or skipping products designed to smooth the hair cuticle.
How can I make my blowout last longer?
Use proper sectioning, cool each section before releasing it, avoid touching the hair excessively, and finish with lightweight styling products for hold and humidity protection.