
The Best Fluffy Pancakes recipe you will fall in love with. Full of tips and tricks to help you make the best pancakes.
How to Clean Hair Tools: A Complete Guide to Brushes, Combs, Hair Dryers, and Styling Tools
Your Hair Tools Could Be Dirtier Than You Think
You wash your hair regularly, invest in quality styling products, and spend time creating your favorite hairstyles. But when was the last time you cleaned your hair tools?
If you can’t remember, you’re not alone.
Hair brushes, combs, blow dryers, curling irons, flat irons, and other styling tools collect far more than just loose hair. Over time, they accumulate oils, product residue, dust, dead skin cells, and even bacteria. Not only can this make your tools less effective, but it can also transfer buildup back onto freshly washed hair.
Learning how to clean hair tools is one of the simplest ways to improve hair health, extend the lifespan of your styling tools, and achieve better styling results.
In this step-by-step guide, you’ll learn how to clean every type of hair tool safely, how often to clean them, and the common mistakes that can damage expensive styling equipment.
Why Cleaning Hair Tools Matters
Many people underestimate how much buildup accumulates on styling tools.
Dirty tools can contribute to:
- Oily-looking hair
- Product buildup
- Reduced styling performance
- Unpleasant odors
- Dull hair appearance
- Increased wear on tools
- Potential scalp irritation
Regular cleaning keeps your tools performing at their best and helps maintain healthier hair overall.
How Often Should You Clean Hair Tools?
The ideal schedule depends on how often you use them.
| Tool | Recommended Cleaning Frequency |
|---|---|
| Hair brushes | Weekly |
| Combs | Weekly |
| Flat irons | Every 1–2 weeks |
| Curling irons and wands | Every 1–2 weeks |
| Blow dryer filter | Monthly |
| Hair clips and accessories | Monthly |
| Diffuser attachments | Monthly |
If you use heavy styling products frequently, you may need to clean tools more often.
Recommended Product:
HJZHII 5-Piece Hairbrush Cleaner Tool Set
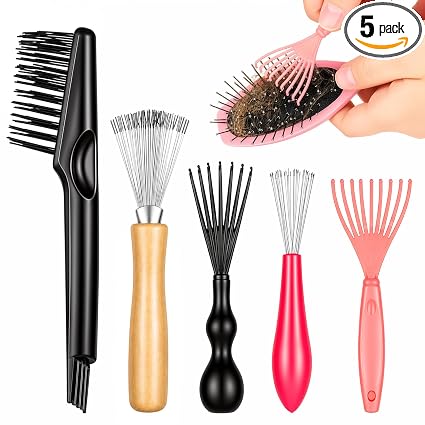
Perfect For:
- Removing hair from brushes quickly
- Cleaning hard-to-reach areas
- Maintaining styling tools regularly
Why it works: Featuring a versatile combination of wire rakes, mini claw tools, and double-ended cleaning brushes, this 5-piece kit handles every level of hairbrush maintenance. The rake tools lift out matted shed hair from paddle and round brushes in seconds, while the small bristle tools sweep away stubborn lint, dust, and dried styling product buildup from tight spaces near the base.
What You’ll Need
Most hair tools can be cleaned with items you already have at home.
Basic Cleaning Supplies
- Mild shampoo
- Dish soap
- Warm water
- Microfiber cloth
- Soft toothbrush
- Cotton swabs
- Rubbing alcohol (optional)
- Small bowl
Always check the manufacturer’s instructions before cleaning electrical tools.
How to Clean Hair Brushes
Hair brushes collect the most buildup because they come into direct contact with your hair every day.
Step 1: Remove Loose Hair
Start by pulling out trapped hair.
You can use:
- Your fingers
- A comb
- A brush cleaning tool
Remove as much hair as possible before washing.
Step 2: Prepare a Cleaning Solution
Fill a bowl with:
- Warm water
- A few drops of shampoo or mild dish soap
Mix gently.
Step 3: Clean the Brush
For plastic brushes:
- Soak for 10–15 minutes.
- Use a toothbrush to scrub between bristles.
- Rinse thoroughly.
For wooden brushes:
Avoid soaking.
Instead:
- Dip the toothbrush into the cleaning solution.
- Scrub gently.
- Wipe with a damp cloth.
Excess moisture can damage wood.
Step 4: Dry Completely
Place the brush bristle-side down on a towel.
Allow it to dry fully before using it again.
Read also : How to Choose the Best Hair Dryer for Your Hair Type
How to Clean Combs
Combs are among the easiest hair tools to clean.
Steps
- Remove trapped hair.
- Soak in warm soapy water for 10 minutes.
- Scrub between teeth with a toothbrush.
- Rinse thoroughly.
- Dry completely.
This process helps remove oils and styling product residue.
How to Clean a Flat Iron
Flat irons often develop a layer of product buildup that can affect styling performance.
Step 1: Unplug and Cool Completely
Never clean a hot flat iron.
Ensure it is:
- Turned off
- Unplugged
- Fully cooled
Step 2: Wipe the Plates
Use a damp microfiber cloth to remove surface residue.
Step 3: Remove Stubborn Buildup
If needed:
- Dampen a cloth with rubbing alcohol.
- Gently wipe the plates.
- Avoid excessive moisture.
Step 4: Dry Thoroughly
Allow the iron to dry before plugging it back in.
Recommended Product:
Hot Tools Professional Styling Iron Cleaner
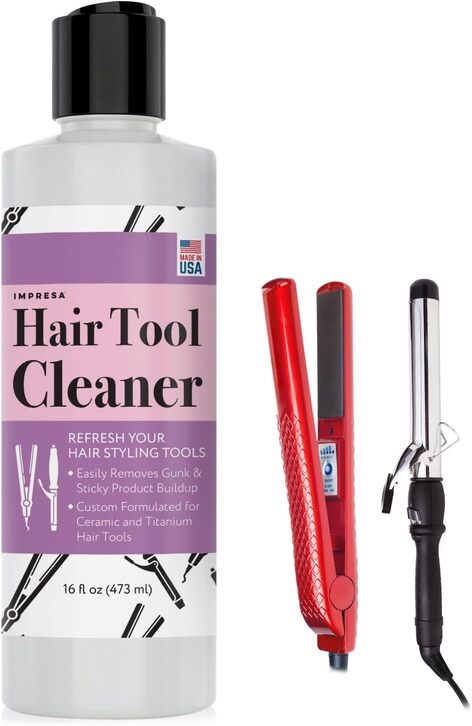
Perfect For:
- Cleaning ceramic styling plates
- Removing product residue safely
- Maintaining flat irons and curling tools
Why it works: Formulated specifically for thermal styling appliances, this non-abrasive formula dissolves stubborn, baked-on hairspray, oils, and product buildup from ceramic, tourmaline, and titanium surfaces. It safely restores pristine cleanliness without scratching delicate plate coatings or leaving toxic residue, ensuring smooth glide and even heat distribution every time you style.
How to Clean a Curling Iron or Curling Wand
Curling tools often collect hairspray, heat protectant, and styling product residue.
Steps
- Unplug the tool.
- Allow it to cool completely.
- Wipe the barrel with a damp cloth.
- Use rubbing alcohol for stubborn buildup.
- Dry thoroughly before storing.
Clean barrels transfer heat more evenly and help create smoother curls.
How to Clean a Hair Dryer
Many people overlook their blow dryer, but a clogged filter can reduce airflow and shorten the life of the appliance.
Step 1: Unplug the Dryer
Safety comes first.
Never clean electrical components while plugged in.
Step 2: Remove the Filter Cover
Many dryers have a removable rear filter.
Consult the user manual if necessary.
Step 3: Remove Dust and Lint
Use:
- A small brush
- A toothbrush
- A dry cloth
Carefully remove debris from the filter screen.
Step 4: Reassemble
Ensure all parts are completely dry before reattaching them.
Why This Matters
A clean filter helps:
- Improve airflow
- Reduce overheating
- Extend dryer lifespan
- Improve drying efficiency
How to Clean Diffuser Attachments
Diffusers often collect product residue and dust.
Steps
- Remove the diffuser.
- Soak in warm soapy water.
- Scrub gently with a toothbrush.
- Rinse thoroughly.
- Allow to air dry.
Make sure it is completely dry before reconnecting it to your blow dryer.
How to Clean Hair Clips and Accessories
Hair accessories can collect oils, products, and dirt over time.
For Plastic Accessories
- Soak in warm soapy water.
- Scrub gently.
- Rinse and dry.
For Metal Accessories
- Wipe with a damp cloth.
- Dry immediately to prevent corrosion.
Signs Your Hair Tools Need Cleaning
Even if you don’t follow a schedule, these warning signs indicate it’s time for a cleaning.
Hair Brushes
- Visible lint buildup
- Product residue
- Hair trapped around the base
Styling Tools
- Sticky surfaces
- Discoloration
- Uneven heating
- Burning smells during use
Blow Dryers
- Reduced airflow
- Overheating
- Excess dust near the filter
Common Hair Tool Cleaning Mistakes
Soaking Electrical Tools
Never immerse heated styling tools or blow dryers in water.
Cleaning While Plugged In
Always unplug electrical devices first.
Using Harsh Chemicals
Strong cleaners may damage coatings and components.
Storing Tools Before Drying
Moisture can lead to mold, odors, or corrosion.
Ignoring Manufacturer Instructions
Always follow the cleaning recommendations provided by the manufacturer.
Tips to Keep Hair Tools Cleaner Longer
A little maintenance goes a long way.
After Every Use
- Remove trapped hair from brushes.
- Wipe styling tools after cooling.
- Store tools in a clean, dry area.
Weekly
- Inspect brushes and combs.
- Remove visible buildup.
Monthly
- Clean blow dryer filters.
- Wash attachments and accessories.
These small habits make deep cleaning much easier.
Recommended Product:
Ship-Shape Comb & Brush Cleaner
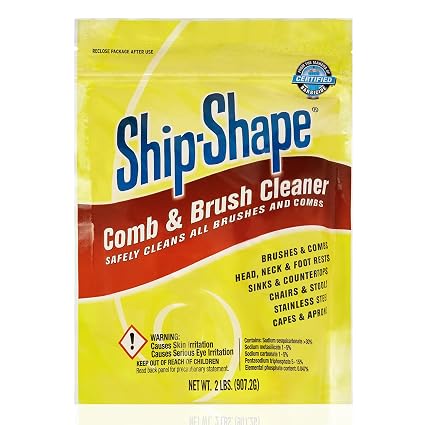
Perfect For:
- Ongoing hair tool maintenance
- Keeping brushes and combs debris-free
- Extending the lifespan of styling equipment
Why it works: Formulated specifically to dissolve stubborn hairspray residue, oils, and grease, this professional-grade soak makes deep cleaning brushes and combs effortless. It safely lifts away built-up grime from bristles and handles without damaging cushions or finish, leaving your styling tools sanitized, residue-free, and performing like new for long-term use.
Conclusion
Learning how to clean hair tools is one of the easiest ways to improve your hair care routine. Clean brushes, combs, styling tools, and blow dryers not only perform better but also help prevent oils, product residue, and dirt from transferring back onto your hair.
By creating a simple cleaning schedule and maintaining your tools regularly, you’ll enjoy better styling results, healthier-looking hair, and longer-lasting equipment. Most cleaning tasks take only a few minutes, but the benefits can make a noticeable difference in both your hair’s appearance and your tools’ performance.
A clean tool works better, lasts longer, and helps you get the most out of every hairstyle.
Frequently Asked Questions
How often should I clean my hair brush?
Most hair brushes should be cleaned at least once a week, especially if you use styling products regularly.
Can dirty hair tools damage hair?
Dirty tools can contribute to buildup, reduce styling effectiveness, and potentially irritate the scalp, although they don’t directly damage hair in the same way as excessive heat.
Is rubbing alcohol safe for flat irons?
Yes, when used sparingly on a cooled, unplugged tool. It can help remove stubborn product residue from styling plates.
Why is my blow dryer losing power?
A clogged filter is one of the most common causes of reduced airflow and overheating.
Can I wash a hair dryer diffuser attachment?
Yes. Most diffuser attachments can be removed, washed in warm soapy water, rinsed thoroughly, and air dried before reuse.